Adding New Web Purchasers to Your Account
Account superusers can create new web purchasers for their account through two methods, Single User Set-up or Bulk Import. Superusers are account admins that have access to all features and can assign/delegate features to new or existing subuser accounts.
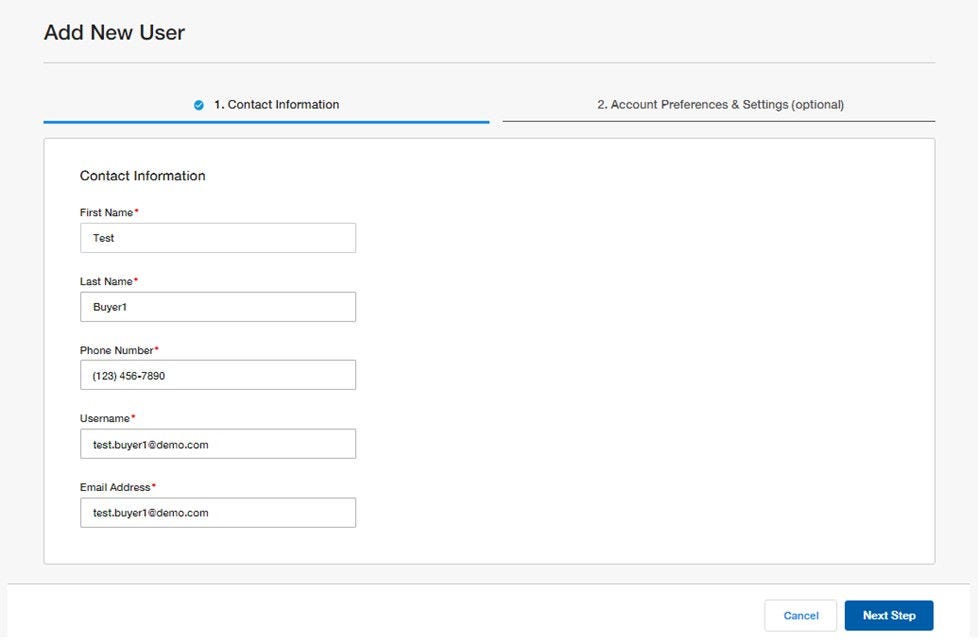
Single User Set-Up
To add a new web purchaser, follow these steps:
- Click on the “Add New User” button located on your User Management page
- Enter the web purchaser’s Contact information
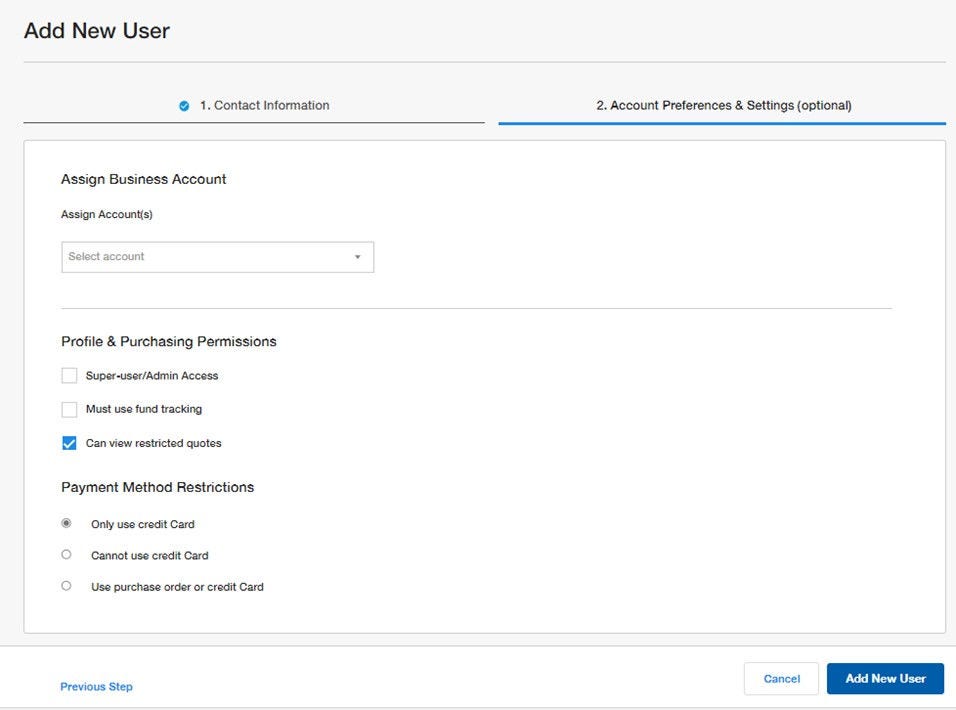
- Set the web purchasers’ Preferences & Settings (optional)
- Assign the business accounts they can use for purchases tracking order status (restricted to the accounts you have access to)
- Assign them subordinate superuser/Admin access
- This will allow them to add and manage their own team members
- You will retain the ability to view and manage their subusers
- Determine if users should have access to sales quotes created by our Sales team for your business accounts (learn more about Managing Quotes)
- Set if they must use Funds when making purchases (applicable only if you have previously set up Fund Tracking for your account)
- Set web payment method restrictions if you want to limit purchases to credit card or purchase order.
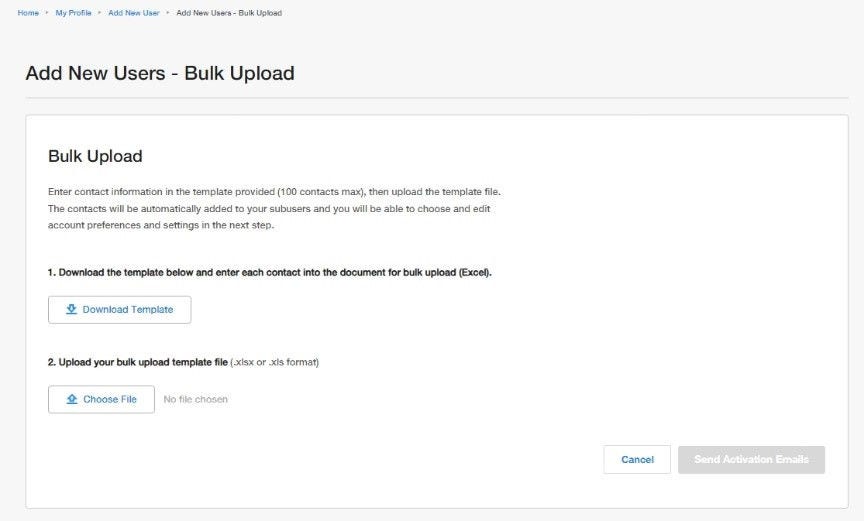
Bulk User Import
If you are setting up a new account for your institution and/or location, use our Bulk Import tool to upload an Excel file and quickly create web purchaser accounts.
- Click the “Bulk Import” button on your User Management dashboard.
- On the Bulk Upload page, select “Download Template” to download the bulk import Excel template.
- Update the Bulk Upload Excel file according to the instructions in the 'Instructions' tab. After updating, upload the file by clicking the 'Choose File' button, and then click the 'Send Activation Emails' button.
- After upload, your request will be processed, and you will receive a confirmation message with the following details:
- The total number of records processed.
- A summary of any processing errors, if applicable, along with an Excel Error report That lists the issues by row and provides instructions on how to resolve them.

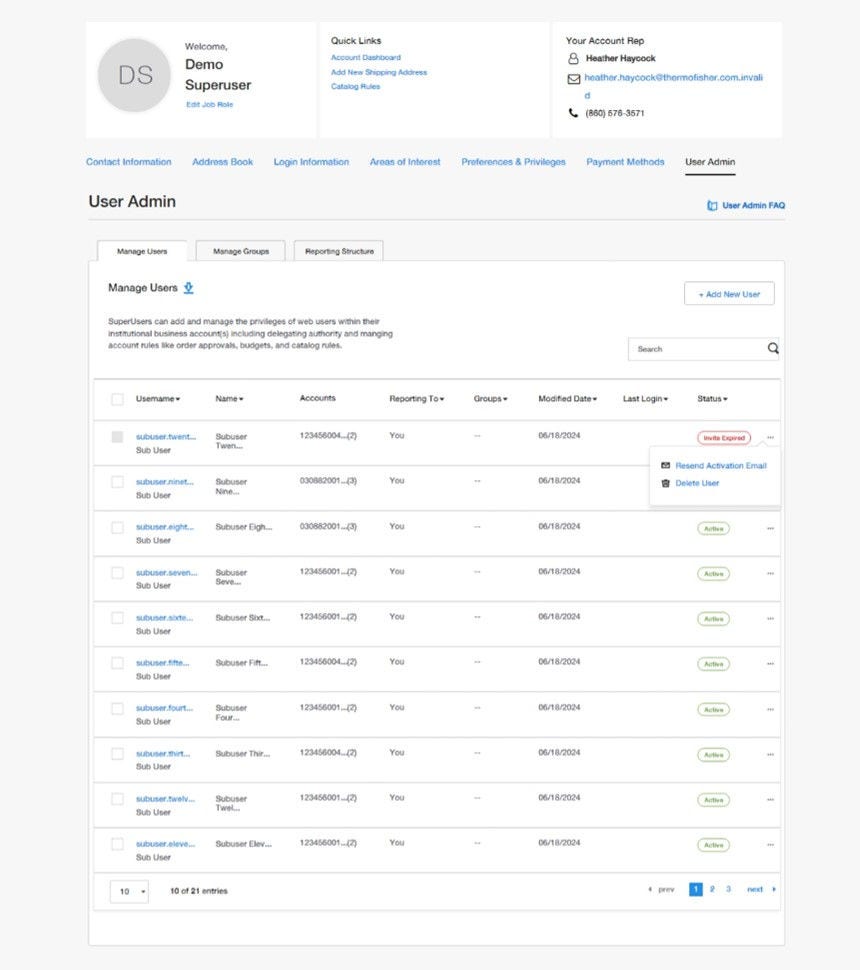
Web Purchaser Account Activation
Subusers must follow specific steps to activate their new Fisher Scientific web user profile. Subusers are assigned and managed by the Superuser or web admin account. The superuser or web admin will be able to track the web user activation status in the User Management Dashboard.
- After adding a new subuser, whether through single set-up or bulk upload, each subuser will receive and must respond to an account activation invite email in order to set their account security information. For security purposes, account activation email expires after 10 days.
- If a subuser responds to an expired invite, they will receive a message that the invitation expired with an option to request and automatically receive a new activation email.
- Within the User Management Dashboard, you can view subusers with expired invitations and resend them by opening the User Administration menu represented by the “…” icon.
More Related Help Topics
Getting Started
Managing Your Business Account
Account Security
Managing Purchasing for Your Organization
Still can’t find an answer?
Help is on the way! Click an option below to chat with support