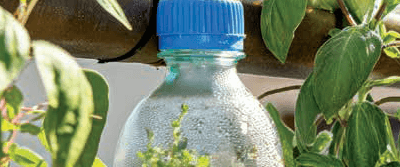
Upcycle Your Favorite Veggies

Food waste is a significant problem and contributes to global warming around the world. With this in mind, it’s important to make the most out of your produce. Here are some instructions for growing some of your favorite vegetables by upcycling vegetable cuttings and plastic bottles.
Materials
• Scrap vegetable(s)
Green onion (white part with roots attached)
Basil, cilantro, or mint leaf with 2 to 3 in. of stem
Celery, lettuce, cabbage, or bok choy stump
• Glass cup or bowl big enough to contain your vegetable cutting
• Toothpicks
• An empty 16 oz. water bottle or 2-liter soda bottle depending on the size of your vegetable (herbs, small lettuces, and baby bok choy can be grown in a 16 oz. water bottle; larger lettuces, celery, and bok choy should be grown in a 2-liter bottle)
• Scissors
• Hammer and nail
• Potting soil
• Masking tape
• Craft paint and paint brush
For a hanging planter:
• Hole punch
• Yarn, string, or ribbon
Instructions
Initiating growth of your vegetable
- Add several inches of water to your glass or bowl.
Important: If using tap water, let it sit out overnight to allow any chlorine in the water to evaporate. - Place the vegetable cutting so that the bottom of it is completely submerged in water but not touching the bottom of the glass or bowl. For larger vegetables, pierce the vegetable cutting horizontally with a toothpick on 3 to 4 sides in order to suspend the vegetable in the water.
- Place your glass or bowl in direct sunlight for approximately 1 week. During this time, you should observe new leaf and/or root growth. When the leaves/roots are a few inches in length, it is time to transfer your vegetable to soil.
Making your upcycled planter
- Cut your water bottle in half with scissors.
Optional: To make a hanging planter, punch holes in the top half of the bottle on opposite sides and thread a piece of string, yarn, or ribbon of the desired length through both holes. Tie the ends together. - Remove the cap. Place a nail in the center of the cap and hit it with the hammer to create a hole in the cap. Put the cap back on the bottle.
Optional: Decorate your planter by first wrapping masking tape around the top half of the water bottle approximately ¼ of the way below the cut edge, then painting the section of the bottle from the tape to the top of the bottle (including the cap if desired). Allow paint to dry. - Flip the top half of the bottle upside down and fill ¾ of the way with potting soil (up to the line of paint if you painted it).
- Place the top half of the bottle (cap side down) into the bottom half of the bottle so that it stands on its own.
Transferring your vegetable to soil
- Create a 1 to 2 in. depression in the top of your soil to accommodate the roots of your vegetable.
- Place the vegetable in the soil with the roots facing downward.
- Add additional soil to cover the roots and pat down until the plant can stand on its own.
- Add water until you see it drip through the cap into the bottom reservoir.
- Water regularly and watch your vegetable grow. Remember to keep it in an area with good sunlight.
Understanding the Science
Plants are an important source of nutrients and energy for humans and animals. Ensuring our communities have an adequate food supply is a constant challenge for farmers around the world. In order to work together to meet the global demand for produce, farmers need to evaluate the available resources before determining which crops to raise in their region.
Scientists can assist farmers by helping them test their soil composition to determine available nutrients and ensure their crops are free of harmful bacteria. Additionally, scientists can help farmers reduce the use of pesticides, decrease water needs, and increase crop yield and quality through genetic engineering.
Originally published by the Thermo Fisher Scientific Corporate Social Responsibility team.